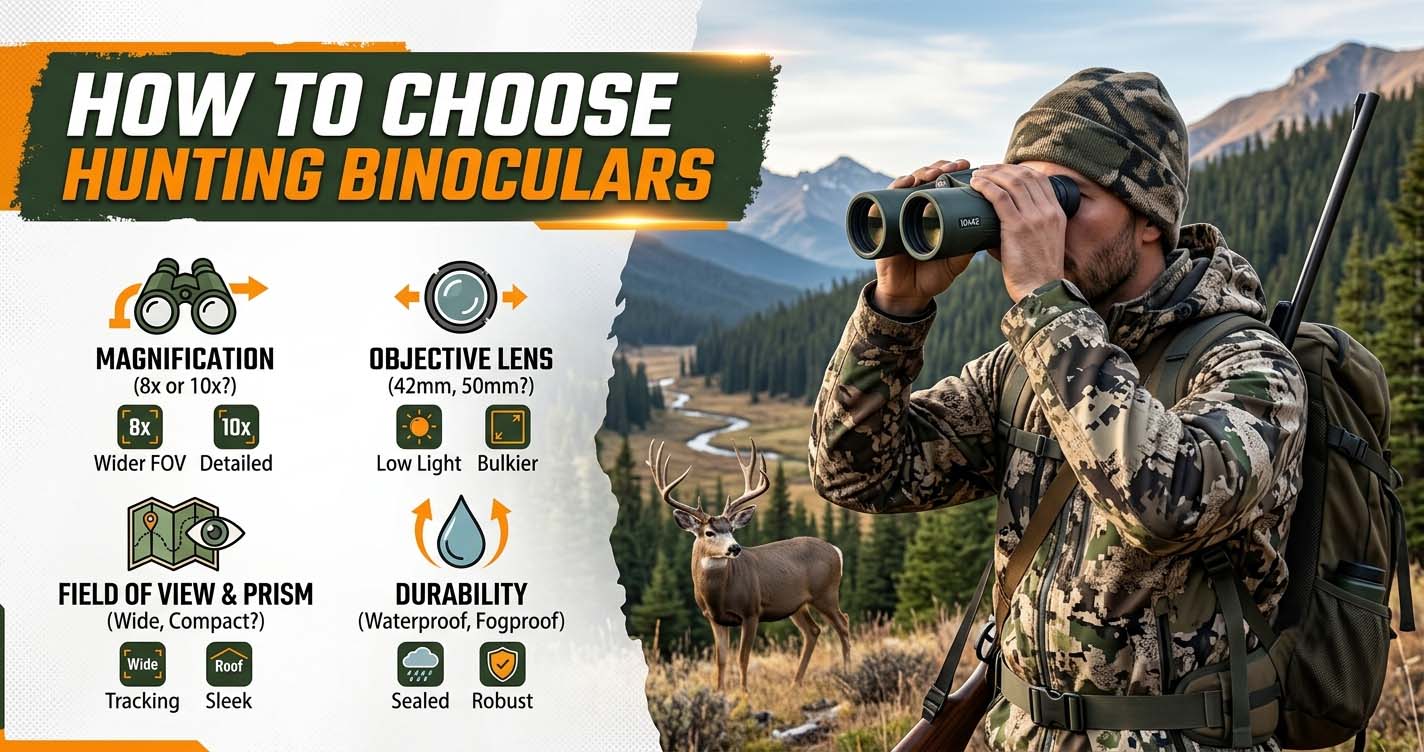
Choosing hunting binoculars comes down to matching three variables: your primary hunting terrain, your typical light conditions, and your physical requirements. Below is a decision framework that narrows your options in minutes.
| Hunting Style | Best Configuration | Key Reason |
|---|---|---|
| Western spot-and-stalk (open country) | 10×42 roof prism | Higher magnification for long-range glassing; large objective for low light at dawn/dusk. |
| Eastern whitetail stands (timber) | 8×32 roof prism | Wider field of view for close cover; compact and light for all-day carry. |
| Backpack hunting / hiking | 8×32 or 10×32 | Weight savings; good balance of magnification and portability. |
| Bow hunting (short range) | 8x or even 6x with wide FOV | Fast target acquisition; less magnification means steadier image. |
Why Binocular Specs Matter More Than You Think
I’ve seen hunters lose opportunities because of cheap glass. Poor binoculars fog up on a cold morning, show chromatic aberration (purple fringing) against a bright sky, or cause eye strain after an hour of glassing. Weight matters too: a heavy pair hanging from your neck all day will have you looking through them less often. Every spec, magnification, objective size, prism type, coatings directly affects how well you see game and how comfortable you stay.
Matching Binoculars to Your Hunting Style
This is where most guides fall short. Rather than giving one-size-fits-all advice, I break it down by where and how you hunt.
Open Country / Spot-and-Stalk
If you hunt the western US, mule deer in sagebrush, pronghorn on plains, elk in alpine basins, you need reach. I recommend 10x magnification as a minimum, 12x if you’ll use a tripod. An objective diameter of 42mm or 50mm gathers enough light for those low-light hours when bucks are moving. A roof prism design keeps the package slim enough to fit in the packaging. Expect to spend at least $400 to get decent glass at this level.
Timber / Whitetail Stands
Eastern hunters and anyone sitting in a tree stand over food plots or thick cover should prioritize field of view over power. An 8×32 or 8×42 gives you a wide, bright image that lets you pick out movement in dense brush. You rarely need to see past 200 yards, so magnification above 10x makes the image shaky. Weight matters here—you’ll be holding them up for long sits. Look for a model under 25 ounces.
Hiking / Backpack Hunting
When every ounce counts, choose an 8×32 or 10×32. The smaller objective saves weight and still performs well in good light. I’ve carried a 10×32 roof prism on multi-day trips and never felt undergunned. Make sure the binoculars have a rubber armor coating and are nitrogen-purged to handle rain and snow.
Budget Versus Performance | Where to Spend and Where to Save
Hunting binoculars follow a cost curve with diminishing returns. Here’s how I break it down.
- $100–$300 (Entry-level): You’ll get adequate optics for daytime use, but expect soft edges, lower contrast, and potential fogging. Good for occasional hunters or kids. Stick with porro prism designs at this price, they offer better brightness for the money.
- $300–$800 (Sweet spot): This range gets you phase-corrected roof prisms, multicoated lenses, and reliable waterproofing. Brands like Vortex, Leupold, and Athlon offer lifetime warranties here. Most hunters should target this tier.
- $800+ (Alpha glass): You pay for exceptional low-light performance, edge-to-edge sharpness, and build quality. If you hunt dawn to dusk or rely heavily on optics, it’s worth it. But don’t think a $1,500 pair will let you see deer that a $600 pair can’t, the gap is narrower than you’d think.
What degrades fastest when you cut budget: coatings (less light transmission, more glare), phase correction (poorer resolution in roof prisms), and water/fog proofing. Don’t skimp on those. You can save on magnification or objective size, but not on sealing.
The Critical Fit Factors That Most Guides Ignore
I’ve watched hunters buy expensive binoculars only to sell them later because they didn’t fit their face. Three things to check.
Eye Relief for Glasses Wearers
If you wear glasses, you need at least 15mm of eye relief. Less than that and you’ll see black rings (kidney beaning) or have to press your glasses into the eyecups. Twist-up eyecups with multiple stops let you adjust for glasses vs. bare eyes.
Interpupillary Distance (IPD)
Binoculars have a hinge that lets you set the width between the two barrels. If your IPD is narrow (say 58mm) and the binocular only goes down to 60mm, you’ll never get a full circular image. Most models cover 56–74mm, but check before buying.
Diopter Adjustment
Almost no article mentions this. The diopter ring (usually on the right eyepiece) lets you compensate for differences between your eyes. Without proper adjustment, the image will never be sharp. Test it: cover the right lens, focus with the center wheel, then switch and adjust the diopter. If the ring slips easily, that’s a deal-breaker.
Weight Distribution
A pair that’s front-heavy will feel heavier than the number suggests. Hold the binoculars for five minutes in the store. If your arms start to tremble, they’re not right for you. A good harness helps, but the balance has to work.
Advanced Optical Considerations for the Serious Hunter
If you’re ready to go beyond the basics, here’s what separates good glass from great.
Coatings
Fully multicoated (FMC) lenses are non-negotiable. They reduce reflections and increase light transmission. For roof prism binoculars, phase correction coatings are critical, without them, resolution drops noticeably. Dielectric coatings on the prism surfaces boost reflectivity beyond 99%, giving you a brighter image than silver coatings. Look for “dielectric” if you want the best low-light performance.
Prism Type: Roof vs. Porro
Modern manufacturing has closed the gap. A quality roof prism binocular (with phase and dielectric coatings) will outperform a cheap porro. But at the same price point, a porro often gives you a brighter, sharper image because it doesn’t need those extra coatings. For hunting, I recommend a roof prism for durability and ease of holding. Porro is fine for casual use or a tight budget.
Field of View vs. Magnification
Higher magnification shrinks your field of view. A 10x binocular might show 300 feet at 1,000 yards, while an 8x shows 400 feet. In thick cover, that 100-foot difference can cost you the chance to spot a deer before it spooks. Know your terrain and choose accordingly.
How to Test Binoculars Like a Pro?
You don’t need a lab to evaluate binoculars. Follow this protocol in the store or at home after a purchase.
- Check for chromatic aberration: Point the binoculars at a high-contrast edge (a branch against a bright sky). If you see purple or green fringing, the glass is poor quality.
- Test edge-to-edge sharpness: Look at a brick wall or a row of text. Focus on the center, then look at the outer 20% of the image. If it goes blurry, that’s a trade-off. Some blur is normal, but it should be minor.
- Evaluate brightness in low light: Find a dim corner of the store or look at a shady area. Compare two models side by side. Brighter is better, but don’t expect night vision.
- Assess focus wheel smoothness: Turn the wheel from close focus to infinity. It should move evenly, without sticking or skipping. Some hunters prefer fast-focus (fewer turns), others want slow for precision. Pick what feels natural.
- Verify waterproofing: You can’t test this in a store, but check for an O-ring sealed design and argon or nitrogen purging. A lifetime warranty like Vortex’s VIP gives you peace of mind if water gets in.
Myths and Reality | What You Can Ignore
I’ve heard these myths from fellow hunters for years. Here’s the truth.
- “You need 12x for long range.” Reality: Handheld 12x is shaky. Even 10x benefits from a tripod. If you’re glassing past 500 yards, get a tripod and a 10x or 12x, but don’t expect to hold it steady offhand.
- “Porro prisms are always brighter.” Not anymore. A modern roof prism with dielectric coatings and phase correction matches or exceeds porro brightness. The weight and durability advantage of roof prisms makes them the better choice for hunting.
- “Expensive binos are always better.” Diminishing returns kick in around $800. The difference between a $400 and an $800 pair is obvious. The difference between $800 and $1,500 is subtle, especially in daylight. Spend wisely.
- “Waterproof is a must, fog-proof is optional.” Wrong. Fog-proofing (argon/nitrogen purge) is more important than waterproofing. Waterproofing adds weight and cost; fog-proofing ensures your lenses don’t steam up when you breathe on them or when temperatures change rapidly.
Frequently Asked Questions
Can I use birding binoculars for hunting?
You can, but birding binoculars often prioritize close focus and light weight over low-light performance and durability. Hunting binos are built for dawn/dusk light, have better eye relief for glasses, and are more rugged. A dedicated pair is worth it if you hunt seriously.
What is the best magnification for bow hunting?
Bow hunting distances are typically under 60 yards. A wide field of view helps you track movement. 6x to 8x magnification is ideal. Some bowhunters even use 6×30 models. Higher magnification only makes the image shakier and narrows your view.
Are waterproof binoculars really necessary?
Not as much as fog-proofing. Waterproofing is nice if you hunt in rain or cross streams, but the real enemy is internal fogging. Make sure your binoculars are nitrogen-purged. Many mid-range models are both waterproof and fog-proof, but don’t pay a premium for waterproofing alone.
How do I know if binoculars are compatible with a tripod?
Look for a threaded socket under a cap on the front hinge, or a removable plate that accepts a tripod adapter. Many binoculars come with an adapter. Brands like Outdoorsman make universal adapters. If you plan to glass for extended periods, a tripod is a game-changer.
Should I buy a binocular harness or a chest pack?
A harness keeps the binos against your chest for instant access and prevents bouncing when you move. A chest pack stores the binoculars plus gear (range finder, calls, snacks). Both are better than a neck strap. I prefer a harness for spot-and-stalk hunting and a chest pack for stand hunting where I want to keep extra gear handy.
Your Final Checklist Before Buying
Before you pull the trigger on a pair of hunting binoculars, run through this checklist.
- Does the magnification and objective size match your primary terrain?
- Is the weight and balance comfortable for a full day’s carry?
- Do you have enough eye relief (minimum 15mm if you wear glasses)?
- Does the diopter adjustment lock in place?
- Are the lenses fully multicoated and (for roof prisms) phase-corrected?
- Is the binocular nitrogen-purged and guaranteed by a lifetime warranty?
- Have you tested it in person or through a reliable return policy?
Choosing hunting binoculars is a decision that affects your success and enjoyment in the field. Follow the framework above, and you’ll end up with a pair that feels like an extension of your eyes. That’s the goal: to see more, spot earlier, and hunt smarter.