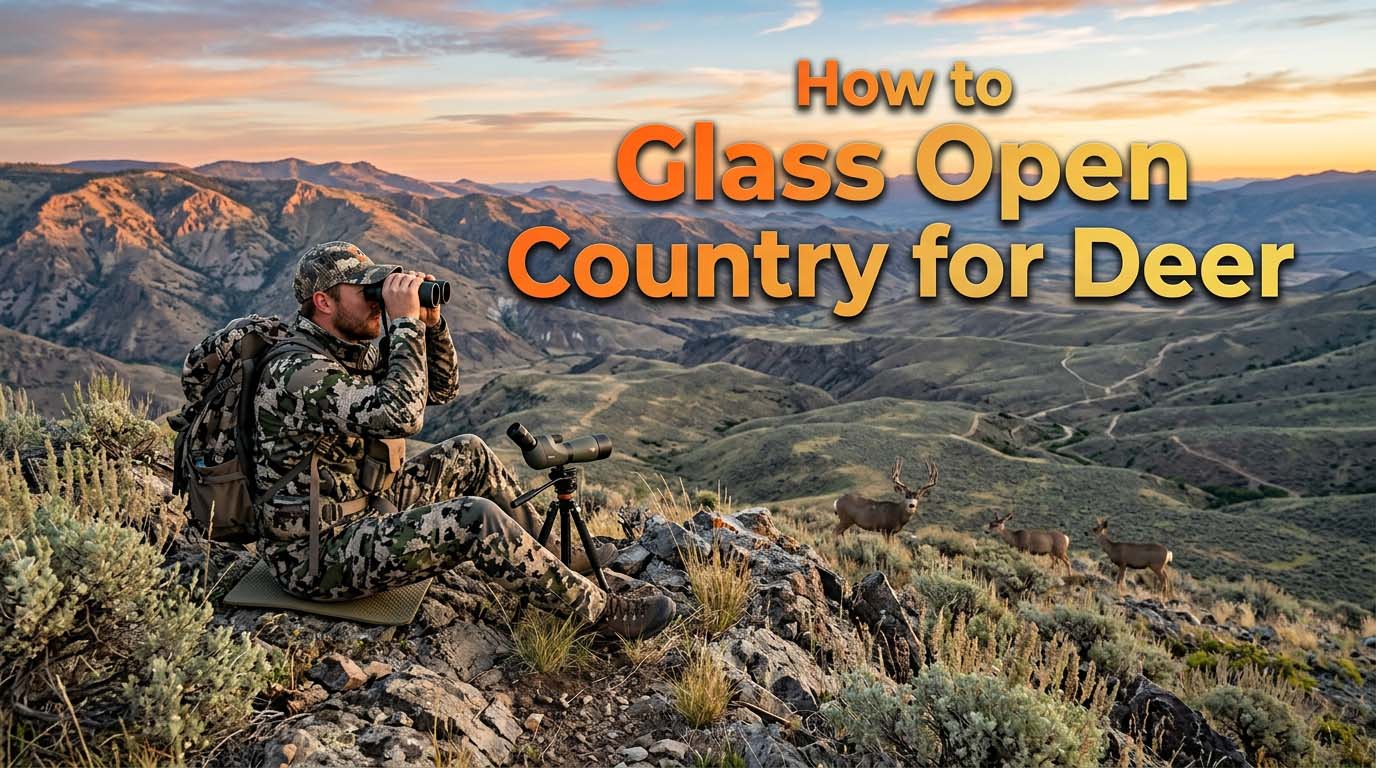
Most hunters picture glassing open country as a long sit: a ridgeline, a pair of expensive binoculars, and a basin that eventually gives up a buck. I’ve sat that way. It fails far more often than it works. Glassing open country for deer isn’t passive waiting.
It’s an active search with a repeatable structure, and the hunters who fill tags in wide-open Western country are not the ones who stare longer. They’re the ones who look in a deliberate order: the ground first, then the glass, then the decision to move.
Effective open-country glassing breaks into three phases: pre-glass terrain analysis, systematic optical scanning, and post-detection decision-making.
Skip the first, and you’re glassing randomly. Skip the last, and you’ll risk everything on a stalk that was doomed before it started.
Here’s the full method, from reading the basin to closing the distance.
Why Open Country Is a Different Game
A hunter who reads eastern timber like a book will feel blind in the first hour of open-country glassing. The whole rulebook is different.
In the woods, you see pieces of a deer at close range, and the deer usually blows out at 80 yards. In open country, you’ll often see the deer before he sees you, sometimes at 1,000 yards or more.
That sounds like a gift, and it is, but the advantage is fragile. The moment you stand up, swing a pack on, or let the sun glint off a lens, the deer reads the motion at half a mile and is gone.
Two facts drive everything else.
Open-country deer are movement-sensitive, not shape-sensitive. They live their whole lives among shapes, cows, rocks, stumps, other deer. A motionless hunter at 500 yards barely registers. A hunter who raises a rifle is a predator in an instant.
This is the deep reason why glassing technique matters: you are effectively invisible in open country as long as you stay still, and you become the most dangerous thing in the basin the moment you move.
The environment fights your vision. Heat shimmers distort everything past 500 yards by mid-morning. The light flattens by noon.
A slope that held four bedded deer at 10 a.m. is a jigsaw of identical rocks and shadows by 1 p.m. And because open country is so big, the natural instinct is to glass all of it, which guarantees you see none of it.
The Equipment That Actually Matters
You don’t need to spend a fortune, but you need the right minimum. The binocular is the workhorse. In open country, 10x is the absolute floor; 12x and 15x are better for long basins; 8x handles edge country and timber but leaves you guessing at antlers on the far side of a canyon.
| Magnification | Strengths | Limits |
|---|---|---|
| 8x | Bright, easy to hold steady, great in low light | Too weak to read antler detail beyond 400 yards |
| 10x | The all-around choice; the best mix of reach and hand-holdability | Detail and antler judgment get shaky past 700 yards |
| 12x | Serious open-country reach; shows tines and bed shapes | Shaky without support; hard to hold still by hand |
| 15x | Spotting-scope detail from a binocular; great for wide basins | Useless without a tripod; heavier and dimmer in low light |
If you buy one thing after your binocular, buy a solid tripod. It’s not an accessory; it’s the difference between seeing the shape of a deer and confirming it’s a shooter.
With a tripod, a 12x binocular becomes a mini-spotting scope: the tines crisp up, the head detaches from the body, and you can study a buck for 20 minutes without your arms shaking.
Handheld glassing has a wall, the one where you’re not sure if that’s a buck bedded or a rock with a lichen patch. The tripod walks you past that wall.
A spotting scope is next. The division of labor in open country is simple: binoculars find the deer, the spotter evaluates it.
Unless the buck is close, I don’t judge antlers through binos; I lock the scope on him and count tines. In open country, you do not want to climb off a point for a 3×3 that fooled you at 900 yards.
Read the Terrain Before You Raise Your Binoculars
Most hunters make their first mistake before the glass ever leaves their chest: they look at the whole basin. A big basin is overwhelming, and if you try to glass all of it, your eyes just slide across the surface.
The best glassers I’ve watched do the opposite. They decide where deer could be before they commit the optics. They search with their brain first, then their eyes.
Thermals and Shade Lines
Open-country deer bed where they can control what comes at them, and that starts with shade. The highest-probability glassing target in any basin is the shade line. In the morning, find the rim rock, the juniper shadow, the dark north edge of a cut. Deer tuck just inside the shade, not in full sun.
A bedded deer is a compact horizontal lump inside a strip of shadow, and once you learn to glass shade lines instead of whole slopes, you’ve reduced your search area by something like 80 percent.
Thermals move deer through the day, and you can predict the shift. In the morning, the sun hits the slope, and warm air rises, carrying scent upward. Deer feel that, so they often bed on the upper third of a slope by late morning, high enough to smell trouble coming from below.
In the afternoon, as shadows creep and air cools, the thermal reverses and sinks. The deer slide down to lower benches. The same basin fishes differently at 9 a.m. and 3 p.m.; your glassing priority should shift with the thermals, not against them.
The Wind Picks the Slope
Deer want the wind in their face, and that simple rule has a huge practical result. On a light-wind day, most deer in a basin will be on the side of the ridge that takes the wind.
If the wind is out of the west, the west-facing points, benches, and saddles are loaded, and the east face is largely empty. On a hard windy day, the pattern shifts a notch: deer tuck just below the crest on the downwind side, out of the raw wind but still nose-first into it.
Either way, glass the wind-facing ground first, and pay special attention to pockets where wind swirls around a point or draws through a saddle. A swirl of scent gives a deer more information than a straight wind, and they know it.
Mark Your Zones Before You Glass Any of Them
Before your first optical sweep, take the binoculars down and use your naked eyes. Scan left to right across the whole visible country and pick three to five spots that just look like deer ground: a shaded bench under a rim, an odd green patch in a dry slope, a saddle with a north drop, a finger ridge with shade on its shoulder.
Then number those spots in your head and glass them in priority order, highest likelihood first.
This does two things. It stops you from staring wherever your eyes randomly land, and it gives you a checklist.
When you’ve cleared zone three, you know it; you don’t have to wonder if you really covered that bench or just thought about it. That simple act of choosing is the difference between an afternoon of looking and a real search.
The Systematic Scanning Method
There is a right way and a wrong way to sweep an open basin. The wrong way is the most common: raise the binos at the far ridge, sweep left to right, drop the binos, feel productive, and repeat.
The far ridge is where the mirage hides deer, and the near country, the ground that actually holds animals you can do something about, gets skipped entirely.
The right way is the grid. It turns a big basin into a manageable set of pieces.
- Divide the visible ground into vertical columns, like the pages of a book.
- Start with the column closest to you.
- Work that column in horizontal bands, starting at the near ground and moving upward. Overlap each band by about 20 percent so nothing slips between the edges of your vision.
- Finish the column, then shift one column to the side and repeat the same band-by-band sweep.
It sounds mechanical, and it is. That’s the point. A bedded deer is a gray shape that reappears at many angles, and the grid forces your eyes to touch every piece of the same ground instead of dancing across it.
Work Near to Far
Follow a strict near-to-far order: 100 to 300 yards first, then 300 to 600, then the far country beyond. There are three reasons.
- Deer found close are actionable. A buck at 250 yards is a stalk you can make today; a buck at 1,200 yards is a plan for tomorrow that may never happen.
- Looking close first trains your eye for scale. You learn how a bedded deer looks at 200 yards, which makes you far better at spotting the smaller version at 700.
- It defeats the infinite-distance trap — the habit of glassing the opposite ridge while a buck is bedded 200 yards below you, in the shade line you never checked.
The Pause-and-Study Rhythm
Sweeping is for catching movement. Pausing is for finding deer. Adopt a rhythm that has both: one slow pass across a column of ground, then a stop on anything with a deer-like shape, a horizontal line, a shadow with an edge, a patch of color that doesn’t match, and study it for 20 to 30 seconds.
If nothing breathes in that time, move on. If you see any part of an animal, lock in and drop to the spotter.
Most of the bucks I’ve found in open basins were not found during the sweep. They were found in the pause after the sweep, in the 30 seconds when I actually forced myself to look at one patch of shade instead of the whole mountain.
Manage Your Eyes and the Heat
Eye fatigue is a real and physical thing. After 40 minutes of glassing, your eyes lock up; you can be looking straight at a bedded buck, and your brain will not register the shape.
This is why every serious glasser develops a rhythm for rest. Every 20 minutes, drop the binos and look at your boots, or at any green plant, for 20 seconds. Let your focus collapse to near ground. It resets the scanning pattern in your eyes and keeps you sharp for the whole day.
Mirage deserves its own respect. When the air starts boiling above sun-heated ground, even a sharp binocular produces a shimmering image that hides more than it shows. The simple move is to drop magnification; an 8x or 10x view cuts through heat waves far better than a 15x.
And recognize that some hours are simply not glassing hours; the heavy work belongs in the first two hours of daylight and the last two or three before dark.
Use Peripheral Vision on Purpose
A bedded deer is still, but the world around it is not, and your peripheral vision is far better than your center vision at catching that.
The trick is to over-sweep slightly: keep your focused eye just off the point where the lens is aimed, or make occasional passes where you watch the edges of the field instead of the center.
It feels strange at first. It works. The flick of a leg, the raise of a head, the white flash of a rump lifting off a bed, those signals appear in the periphery more often than in the sharp center of the lens.
What to Look For When Deer Blend Into Nothing
A bedded mule deer at 800 yards is about the size of a dinner plate. It matches the sage, throws a shadow like a rock, and holds still for ninety minutes at a time. You will rarely see the whole deer.
You will see a clue, and recognize it, and the animal will appear to you out of the landscape.
The Partial Deer
Open country is full of vertical things: tree trunks, dead sticks, cactus, standing rocks. A bedded deer is one of the only horizontal lines in that world.
This is the first thing to train: stop on every horizontal streak that isn’t obviously a log. It might be a back in a shade line, a rump above a grass patch, or an antler tine lying flat against a hill.
Then watch for movement cues. The ear flick is the single best finder in open country. A bedded deer clears its ears of flies several times an hour, and at half a mile that flick of white inner ear catches the sun.
A leg stretched forward, a head raised to check the wind, a slow tail switch- all of these betray a bedded deer long before the full body registers.
Deer, Rock, Shadow, or Cattle?
This is the judgment call that separates a good glasser from everyone else. The table below is the checklist I run through on every suspicious shape.
| Clue | Deer | Rock, shadow, or cattle |
|---|---|---|
| Body outline | Irregular oval with a small head at one end; the back is a clean horizontal line | Rocks are rounder and darker at the base; cattle are boxy, wider, and block-headed |
| Head | Visible as a separate shape, often held above the body line | Rocks have no head; shadows have no edge that matches the ground; cattle carry a wide muzzle low to the ground when grazing |
| Shadow | The body catches light on top; the shadow is below, at the base | A rock sits in its own shadow, so the whole shape is dark; cattle cast odd, blocky shadows |
| Color patch | Mule deer have a bright white rump patch that reflects light even in shade | Nothing in the sage is that white; a white patch in shadow is a strong deer signal |
| Movement | Ear flick, head raise, leg stretch — small, deliberate, periodic | Rocks and shadows don’t move; cattle move steadily in groups with heads down while grazing |
Reading Shape: Bedded, Feeding, or Moving
The same deer carries completely different shapes depending on what it’s doing, and that shape tells you what to do next.
A bedded deer is a compact lump. The head is low on the front end, sometimes stretched flat along the ground.
The shape is calm and static. When a bedded deer raises its head to chew cud, the motion is slow and smooth, more like a surfacing swimmer than a startled animal. This deer is committed to staying put for hours. It can be stalked deliberately.
A feeding deer is taller and busier at the front. The head drops, rises, and drops again in a steady rhythm, and the deer takes a few slow steps between bites.
A feeding deer is the easiest of all to spot, because the head movement is constant. It’s also the deer you have the most time with; it’s staying in the neighborhood, working a food source, and a stalk can be conducted at leisure.
A moving deer is a shape crossing a slope at a walk or trot, the white rump flashing on every stride. It’s easy to spot and the hardest to stalk, because it’s covering ground faster than you can flank it.
Watch a moving deer for a full minute before you decide anything, it is usually heading to a bed. If you can predict the bed, you can plan an approach to the bed, not to the moving speck in front of you.
The Moment Between Glassing and Stalking
You’ve found a shooter. The glassing has worked. And this is exactly where most hunters lose the hunt.
The instant a buck appears, something in the brain says “move.” Stand up, sling the pack, get a better angle, check the wind, anything. I’ve done all of it, and it has cost me more deer than any mistake I’ve made in the actual stalk.
The rule is unbreakable: do nothing at the moment of first sight. Breathe. Lower the binos. Let your hands stop shaking. Then start earning the right to move.
Give Any Buck a Quarter-Hour of Watching
The 15-minute rule is the heart of the decision phase. When you find a buck, watch him for 15 minutes before you even choose an approach. In that window, you learn what a full stalk depends on: Is he bedded for the day, feeding toward a specific draw, or slowly working his way out of the basin? Is he in a spot where he’ll see you the moment you crest the rise? Is he alone, or does he have eyes and ears posted around him? Every bit of this information costs you nothing but patience, and it changes the stalk from a gamble into a plan.
Read His Body Language First
A relaxed buck shows it. He chews cud with a slow, regular jaw motion. His ears rotate loosely, one forward, one sideways. His head hangs low, his eyes half-lidded. That’s the deer you can approach.
A nervous buck shows that too. His head comes up, his ears lock forward toward you, his tail lifts a few degrees. If his head is up and his ears are pinned in your direction, he has seen or winded you.
A buck that stares directly at you for more than a few seconds, from any distance under 600 yards, has made you. Do not move. If you absolutely have to move, to get behind cover, to reposition, move only when his head drops behind a bush or swings away to look at something else. Move when he eats, never when he watches.
When to Walk Away Before It Starts
Some stalks should not begin. Knowing which ones is as important as reading the buck. Call it off when:
- He has already spotted you and is staring hard in your direction.
- The ground between you is wide open — a flat expanse with no draw, no fold, no drainage to hide your approach. In open country, you cannot cross that ground without being seen, and the glassing was the hunt.
- The wind is carrying your scent straight to him, and no route fixes that.
- He’s feeding or moving toward a fence line, a road, or another hunter’s glass.
- The spotter confirms he isn’t the deer you came for. Let him go; the next basin may hold the one.
Plan the Approach While Still Behind Glass
Terrain is your only cover in open country, and you can see all of it from your vantage point, so use it.
Don’t draw a straight line to the buck. Draw a line along the folds: the draws, the drainages, the back sides of ridges, the sage patches that stand taller than your body when you’re kneeling.
Break the stalk into legs. Pick a landmark, a rock, a bush, the lip of a cut, that is closer to the buck and would completely hide you from his position. Get to that landmark, re-glass, reassess, and pick the next one.
This is how a 900-yard approach gets made: not by walking the open ground, but by swimming from one piece of cover to the next.
And respect the one thing that ruins more approaches than anything else: the last look. Open-country deer count on their eyes. If his head comes up while you’re moving, freeze; mid-step is fine.
Hold still until he looks away, even if it takes five minutes. The deer that gets the last look is the one that leaves you looking at nothing.
Frequently Asked Questions
Can you glass open country without a tripod?
Yes, but only with rules. The tripod is the strongest tool for open country, but a mobile hunter can make do. Sit down and brace your elbows on your knees. Go prone and rest the binos on a backpack.
Use a rock, a stump, the hood of a truck, anything that turns your arms into a fixed base. A monopod or trekking poles work as a middle ground and pack easier.
The real cost of skipping the tripod is sustained detail. You can’t hold 12x or 15x glass steady with your arms long enough to study a buck for 15 minutes, so keep your handheld sessions shorter, glass in bursts, rest your arms between them, and re-aim.
The moment you suspect you’re looking at a deer, find an improvised rest before you judge antlers, even if it means lying flat on the spot. Better a dirty jacket than a passed-over shooter.
The tripod becomes non-negotiable the moment a buck is bedded at long range, and you need 15 straight minutes of stable viewing to read his body and his antlers.
How do you stop mirage from ruining your glassing at midday?
You can’t stop the mirage; you work around it. Heat shimmer is boiling air above sun-heated ground, and it destroys detail beyond 500 yards. The tactics that actually help:
Drop the magnification. An 8x or 10x view stays stable through heat when a 15x image pulses and wobbles. Avoid glassing across bare dirt or dark rock in full sun, where the heat column is thickest; grass and shaded slopes shimmer less.
And schedule your day so the middle hours are reserved for moving, eating, and glassing close country, under 400 yards; mirage rarely matters.
There’s one trick worth knowing: when you’re forced to look at a distant slope at midday, wait for a cloud to pass over the sun.
The momentary drop in heating settles the air just enough for a clear read. It’s the same reason the first few minutes after a rainstorm are the clearest glassing you’ll ever do.
What’s the best way to glass into the sun?
Put a shadow between your eyes and the sky. Most of the glare that ruins a glassing session isn’t the sun itself, it’s the light bouncing off your own lens and entering your eye from the side. Get on the dark side of a rock, a juniper, or a rim, and suddenly the lens is readable.
Use your hands as a shade over the eyepieces, pull the eye cups out fully so no side light slips in, and use lens hoods if your binoculars have them.
A good multicoated lens cuts the worst of the internal glare, but even the best coating can’t fix a direct sun line. Plan heavy glassing for early morning and late afternoon, when the sun sits behind your shoulder instead of in your eyes.
And if the sun is directly in front of the slope you need to read, don’t suffer for an hour, walk 50 yards sideways to change the angle. Moving your own position 50 yards can flip glare into silhouette, and that silhouette might be all you need.
Should you glass the same area twice if you didn’t see anything the first time?
Yes, and the second pass is often the one that produces. The light changes everything in open country. A slope that was flat and featureless at 9 a.m. can be lit up by 10:30 from a slightly different angle, turning a bedded buck’s rump into a white signal you couldn’t have missed.
Shade lines move, and deer move with them. The basin you cleared at first light may be holding deer by mid-morning.
But re-glass differently. Don’t stand in the same spot and scan the same way with the same eyes; that’s not persistence, it’s stubbornness. Climb 20 yards higher. Sideshift 50 yards. Get a new angle, and the same basin reveals entirely new shelves, pockets, and shade lines.
The rule is simple: re-scan the same area only when something about the view has changed- the light, your position, or the time of day. Same spot, same method, new hope? No. Move something, then look again.