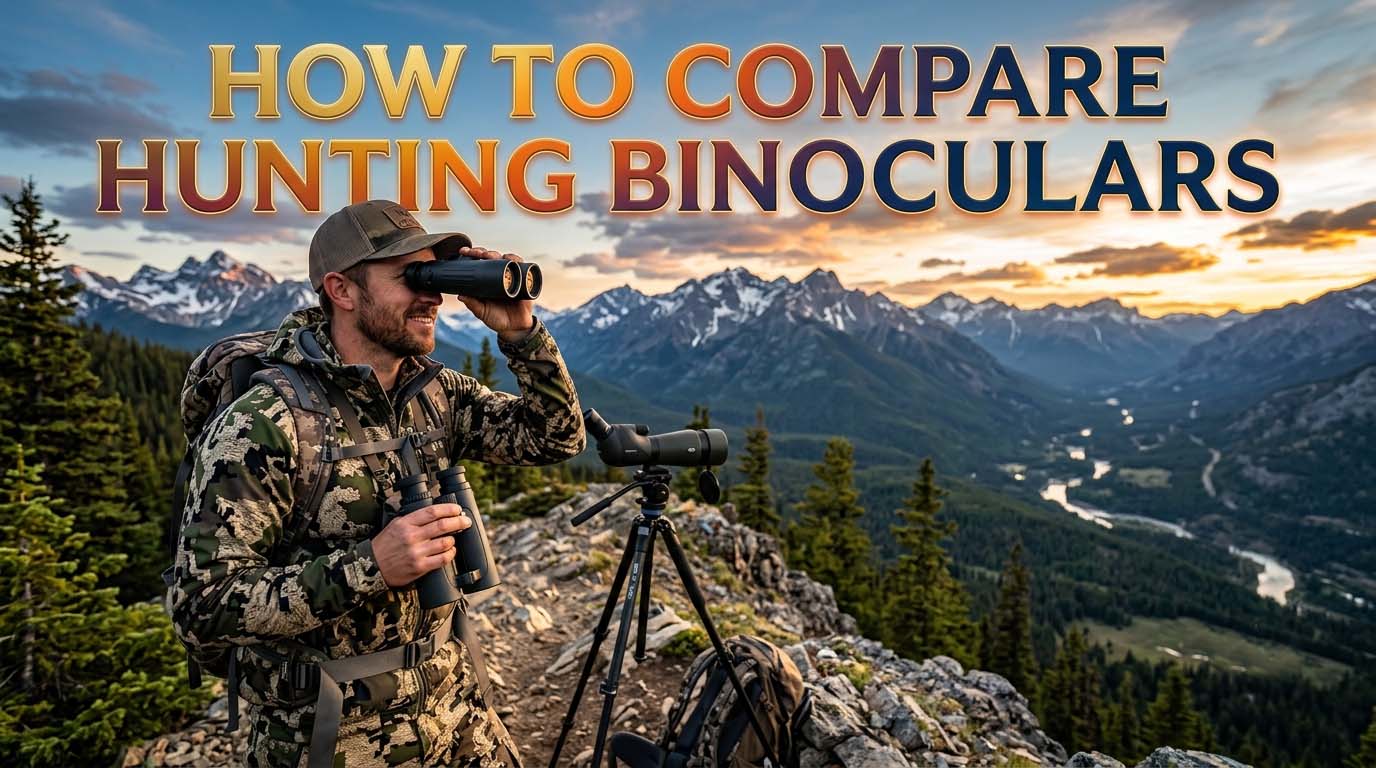
Comparing hunting binoculars comes down to more than reading spec sheets. Numbers like magnification and lens size only tell part of the story. The real method is to measure every pair against the same four standards: Optical Performance, Build Quality, Ergonomics, and Use-Case Fit.
In my years of hunting across different terrain, I have used this system to pick binoculars for myself and for friends heading into very different country. It works because it keeps a single impressive spec from hiding a weakness somewhere else.
Once you know what lives inside each pillar, you can score any binocular against any other and make a choice you will not second-guess.
The Four Pillars of Comparison
Every hunting binocular can be judged on four pillars. Each pillar answers a different question, and together they cover everything that matters in the field.
- Optical Performance asks: How clear and bright is the image, and how well does it hold up in low light?
- Build Quality asks: How well is the binocular put together, and will it survive the abuse of a hunting season?
- Ergonomics asks: How does it feel in your hands, against your eyes, and around your neck during a long day?
- Use-Case Fit asks: Does this binocular match the way you hunt and the places you hunt?
Most buyers focus only on the first pillar. That is a mistake. I have owned binoculars with gorgeous optics that were so heavy I left them in the truck, and tough comfortable binoculars with glass that went dark too early in the evening. You need all four pillars to work together.
The Myth of the Best Binocular
There is no single best hunting binocular. The idea that higher magnification or a bigger objective lens always wins is one of the most expensive mistakes a hunter can make.
A 10×50 pair looks great on paper. You get ten times magnification and a 50mm objective lens that gathers plenty of light. But then you carry them on a ten-mile spot-and-stalk hunt. The weight wears on your neck, and at 10x, every heartbeat shows up as a shake in the image.
You end up bracing against a tree just to get a steady look at a buck across a canyon. Meanwhile, your buddy with an 8×42 pair is already counting antler points because his binoculars are steady enough to hold freehand.
The reverse is also true. A compact 8×32 pair is light and easy to carry, but in the last twenty minutes of shooting light, the small objective lens will not gather enough light to show you a deer standing in the shadows.
The best binocular only exists in relation to how and where you hunt. That is why this comparison method matters.
What to Compare Within Each Pillar
Each pillar contains specific attributes you can measure, test, and score against another binocular. Here is what to look for and how to compare it.
Optical Performance
Magnification is the first number in a binocular’s name, like the 8 in 8×42. It tells you how many times closer an object appears. For freehand use, stick to 8x or 10x. Anything more is hard to hold steady. Compare by asking yourself: Do I need to see farther, or do I need a steadier image?
Objective Diameter is the second number, like the 42 in 8×42. It is the size of the front lens in millimeters. A larger objective gathers more light and gives a brighter image, but it also adds weight and bulk. Compare two binoculars with the same magnification but different objectives, such as 8×32 and 8×42, and the 8×42 will look brighter in low light.
Exit Pupil is the objective diameter divided by the magnification. It tells you how much light reaches your eye. A larger exit pupil is better in low light. For hunting in deep woods or early morning, look for an exit pupil around 5mm or larger. For bright open country, 4mm is enough.
Field of View is how wide an area you can see at a set distance, usually listed in feet at 1,000 yards or in degrees. A wider field of view makes it easier to find game quickly, especially in dense cover. Compare this number directly. A difference of 50 feet at 1,000 yards is noticeable when a buck is quartering through brush.
Eye Relief is the distance between your eye and the eyepiece where you can still see the full image. If you wear glasses, you need eye relief of at least 15mm, ideally closer to 18mm. Compare this number carefully if you hunt with eyewear.
Resolution and sharpness are how much fine detail the binocular can resolve. Test it by looking at a distant object with fine detail, like a fence post with bark texture or a sign with small letters. The binocular that shows more detail at the same distance has better resolution.
Color Fidelity describes how accurately the binocular reproduces color. Some models add a warm or cool tint to the image. Look at a brown deer in golden grass. A binocular with accurate color will show natural tones. A binocular with poor color fidelity might make the deer look unnaturally red or washed out.
Low-Light Performance is the combination of objective diameter, lens coatings, and glass quality. Compare two binoculars side by side in the last few minutes of legal shooting light. The one that still shows detail in shadow has better low-light performance. This matters more than any single spec on the data sheet.
Chromatic Aberration is the color fringing you see along high-contrast edges, like a dark branch against a bright sky. It shows up as purple or green lines along the edge. Compare two binoculars by looking at the same high-contrast target. The one with less color fringing has better glass.
Edge Sharpness describes how crisp the image stays toward the outer edge of the view. Most binoculars are sharp in the center but softer at the edges. Look at a straight line like a power pole and move it to the edge of the view. The binocular that keeps the line crisp has better edge sharpness. This matters when you are scanning a hillside for antlers.
Build Quality
Prism Type refers to how the image is corrected inside the binocular. The two designs are roof prism and porro prism. The comparison below covers how they differ in real hunting conditions.
Lens Coatings reduce glare and increase light transmission. Look for the term “fully multi-coated,” which means every glass surface has multiple layers of anti-reflective coating. For roof prism binoculars, also look for “phase-coated” prisms. Phase coating corrects a color shift that roof prisms cause and improves resolution and contrast. If a roof prism binocular does not list phase coating, skip it.
Waterproofing comes from O-ring seals inside the body. Check the specs for “O-ring sealed” or simply “waterproof.” A hunting binocular needs to survive rain, snow, and the occasional creek crossing.
Fog-Proofing happens when manufacturers purge the body with nitrogen or argon gas before sealing it. This prevents moisture from condensing inside the binocular when the temperature changes quickly. Look for “nitrogen purged” or “argon purged” in the specs. Argon is slightly better because its molecules are larger and escape more slowly, but nitrogen is perfectly fine.
External Armor is the rubberized coating that protects the binocular from bumps and gives you a non-slip grip. Press on the armor. It should feel secure, not thin or slippery. This matters when your hands are wet or covered in blood from field dressing.
Warranty is a strong sign of build quality. Look for a company that stands behind its product with a solid warranty. Some brands offer a lifetime guarantee that covers damage from any cause. That tells you they expect the binocular to last.
Roof Prism vs. Porro Prism in Real Hunting Conditions
Roof prism binoculars have straight barrels. Porro prism binoculars have barrels that bulge and look old-school. The design differences lead to real trade-offs in the field.
Durability: Roof prism binoculars are generally tougher. Their internal components lock together more tightly, and the straight body resists impact better. If a pair falls off a truck tailgate, the roof prism pair is more likely to survive. Porro prisms can knock out of alignment more easily when dropped.
Weight: Roof prism binoculars are typically lighter than porro prism binoculars of the same magnification and objective size. For a backpack hunter covering rough country, the weight savings matter. Porro prism binoculars feel heavier for their size.
Image Brightness: Porro prism binoculars naturally produce a brighter image than roof prism binoculars of the same optical quality. However, modern phase coatings on roof prisms close most of that gap. In a side-by-side test, the difference is small unless you are comparing budget models.
Repair Cost: Porro prism binoculars are simpler and cheaper to repair. Roof prism binoculars require precise alignment and are more expensive to fix. If you are on a budget and plan to keep a pair for years, that matters.
Here is how to choose based on your hunting style. If you are a budget-conscious stand hunter who mostly hunts from a fixed position in the eastern woods, a porro prism pair gives you excellent image quality for the money. If you are a backcountry hunter in the West who needs lightweight gear that can take a beating, a roof prism pair is worth the extra cost.
Ergonomics
Weight includes the binocular itself plus the harness or strap you carry it on. Every ounce feels heavier after mile five. Weigh the binocular in your hand, then imagine carrying it for a full day. Compare directly. A difference of six ounces between two models is very real over the course of a season.
The focus wheel should turn smoothly, without sticking or grinding. It should also be fast enough to go from close focus to infinity in one rotation. Test this by focusing on a branch ten yards away, then immediately focusing on a ridge a mile away. The binocular that snaps into focus faster will help you acquire game more quickly.
Eye Cups are the rubber rings that rest against your face. They should extend and retract smoothly. If you wear glasses, you will likely need the eye cups twisted down to get your eye at the right distance. Test this while wearing your glasses. If the image cuts off at the edges, the eye relief or eye cup adjustment is not working for you.
Diopter Adjustment is a small ring on the right eyepiece that lets you fine-tune focus for the difference between your two eyes. It should lock into place once set. A loose diopter that moves on its own will ruin your image every time you take the binocular out of your pack. Test it by setting it and shaking the binocular gently to see if it stays put.
Balance is how natural the binocular feels in your hands. Hold it up to your eyes and scan a treeline. If it feels front-heavy or awkward, you will notice it after a few minutes. Compare the feel of each model in your hands, not just the specs on paper.
Use-Case Fit
Hunting Style: The way you hunt should drive your choice. A spot-and-stalk hunter in the mountains needs lightweight binoculars with good low-light performance. A treestand hunter in the Midwest can carry a heavier pair because the walking distance is short. A still-hunter in dense timber needs a wide field of view more than high magnification.
Terrain: Open country in the West rewards 10x magnification and a larger objective. Dense eastern woods reward 8x or even 7x, with a wider field of view for quick target acquisition at close range. Match the binocular to the ground you actually hunt, not the ground you wish you hunted.
Duration of Use: How long do you spend with your binoculars pressed to your eyes? A hunter who glasses for hours needs a comfortable, balanced pair. A hunter who uses binoculars in short bursts can tolerate a heavier, more basic pair.
Glasses: If you wear glasses, eye relief and eye cup design are critical. You need at least 15mm of eye relief to see the full image with glasses on. Some models are designed specifically with this in mind.
Budget: Set a budget before you start comparing. Within any price range, the four-pillar framework works the same. The difference is that at higher prices you get better glass, tougher components, and a brighter image in low light. At lower prices you give up some performance but may gain value if you only hunt a few weekends a year.
Step-by-Step Comparison Workflow
Now that you know the attributes, here is a repeatable process to compare any two binoculars side by side. This is how to compare hunting binoculars in practice, without getting lost in marketing claims. I use this method every time I evaluate a new pair for myself or help a friend pick one out. It takes about thirty minutes and keeps you honest.
- Gather the specs
- Score each attribute
- Weigh by hunting style
- Calculate the total
Gather the Specs
Write down the specs for each binocular you are considering. Use the manufacturer’s website or the box in the store. Record magnification, objective diameter, field of view, eye relief, weight, prism type, coating type, and warranty terms.
Score Each Attribute
For each attribute, give the binocular a score from 1 to 5. A score of 5 means excellent. A score of 1 means poor. Be honest. If you cannot tell the difference between two binoculars on a specific attribute, give them the same score. Do not overthink it. The goal is a rough ranking, not scientific precision.
Weigh by Hunting Style
Not every attribute matters equally to every hunter. A low-light performance score of 5 matters more to a hunter who only hunts the last hour of the day than to a hunter who hunts mid-afternoon. Assign a weight to each pillar based on your hunting style.
For a spot-and-stalk mountain hunter:
- Optical Performance: 40%
- Build Quality: 25%
- Ergonomics: 25%
- Use-Case Fit: 10%
For a treestand whitetail hunter:
- Optical Performance: 30%
- Build Quality: 25%
- Ergonomics: 20%
- Use-Case Fit: 25%
For an eastern still-hunter in dense woods:
- Optical Performance: 30%
- Build Quality: 20%
- Ergonomics: 25%
- Use-Case Fit: 25%
These weights are a starting point, not a rule. Adjust them to fit your own situation.
Calculate the Total
Multiply each pillar score by its weight, then add the results. The binocular with the higher total is the one that fits your hunting life better. Write it down and keep the calculation sheet. It will help you resist the urge to buy the more expensive pair just because the salesman likes it.
Here is a comparison table template you can recreate:
| Attribute | Binocular A Score (1-5) | Binocular B Score (1-5) | Weight (%) |
|---|---|---|---|
| Optical Performance | |||
| Build Quality | |||
| Ergonomics | |||
| Use-Case Fit | |||
| Weighted Total |
Here is a worked example so you can see how the criteria play out. Say you are choosing between an 8×42 roof prism binocular at $400 and a 10×42 roof prism binocular at $350. You hunt a mix of open fields and timber in the Midwest, mostly from a treestand, and you walk less than a mile to your stand.
Optical Performance: The 8×42 scores a 4 because of a wider field of view and a steadier image. The 10×42 also scores a 4 because it shows more detail at distance but is harder to hold steady. Equal.
Build Quality: The $400 model is argon purged and has a stronger armor coating. The $350 model is nitrogen purged, but the armor feels thinner. The $400 model scores a 5, and the $350 model scores a 3.
Ergonomics: The $400 model weighs two ounces more but balances better. The $350 model is lighter, but the focus wheel is stiff. The $400 model scores a 4, and the $350 model scores a 3.
Use-Case Fit: The 10x magnification of the cheaper model is better for glassing open fields from a stand. The 8x is better in timber. This is close, so both score a 4.
Using the treestand weights from above:
$400 model: (4 x 0.30) + (5 x 0.25) + (4 x 0.20) + (4 x 0.25) = 1.20 + 1.25 + 0.80 + 1.00 = 4.25
$350 model: (4 x 0.30) + (3 x 0.25) + (3 x 0.20) + (4 x 0.25) = 1.20 + 0.75 + 0.60 + 1.00 = 3.55
The $400 model wins, mostly because of build quality. The scores show you exactly why, so you can make the call with confidence instead of guessing.
How to Field Test Binoculars Before Buying
Specs and scores only take you so far. The real test happens outside, preferably in the conditions where you hunt. Here is a five-step field test I run on every pair of binoculars before I buy them.
- Test low-light performance at dawn or dusk
- Check chromatic aberration on a high-contrast edge
- Evaluate the focus wheel
- Verify eye relief for glasses wearers
- Do the breath test for fogging
Test Low-Light Performance at Dawn or Dusk
Take both binoculars outside during the last half-hour of legal light. Point them at the same object, such as a field edge or a treeline. Compare how much detail you can see in the shadows. The binocular that shows more detail in the darkest conditions wins. This is the single most important test for hunters, because most mature bucks are killed in low light. I have compared binoculars this way and watched the more expensive pair lose. The numbers on paper had told me the opposite.
Check Chromatic Aberration on a High-Contrast Edge
Find a dark object against a bright sky, like a bare branch or a power line. Look at it through each binocular and note the color fringing along the edge. Purple or green lines are a sign of chromatic aberration. The binocular with less color fringing has better glass. This affects how you see a buck’s antler tips against a bright sky.
Evaluate the Focus Wheel
Focus on an object close to you, then immediately focus on something far away. Repeat this several times. The focus wheel should turn smoothly with consistent resistance. It should not be so stiff that your fingers ache or so loose that it drifts out of focus. Also check the direction of the focus pull. Some hunters prefer a clockwise-to-far focus, others the opposite. Pick the one that feels natural.
Verify Eye Relief for Glasses Wearers
If you wear glasses, put them on and use the binoculars with the eye cups in the position you would use in the field. Look at a bright scene. If you see black edges or a cut-off image, the eye relief is not enough for you. If the full image appears clearly, the eye relief works. This is a deal-breaker test. No amount of optical quality compensates for an image you cannot see fully.
Do the Breath Test for Fogging
Breathe heavily onto the lenses, just like you would fog up a window. The moisture should evaporate or wipe away cleanly. If moisture seeps inside the lens, you are looking at a future problem. Also check the body for gaps or loose seams. Rainwater finds every weakness. I once tested a pair that failed this breath test on the store counter. The salesperson said it was normal. It was not. Six months later, the same binocular fogged up on a cold morning hunt, and I missed the best buck I had seen all season.
After the field test, add a final note to your comparison sheet. Which binocular felt better in your hands? Which one did you reach for more often? That instinct matters. Listen to it.
How to Make the Final Choice
You have the scores. You have the field test results. Now you need to make a final decision. Here is how to interpret everything.
Start with the weighted totals. The binocular with the higher number is likely your best choice. But do not stop there. Look at any attribute where the two binoculars are very far apart in score. A binocular that scores a 5 on optical performance and a 2 on ergonomics is not better than one that scores a 4 on both. The balanced binocular will serve you better on a long hunt.
Consider the trade-offs. A heavier binocular with better glass might be worth it if you mostly hunt from a stand. A lighter binocular with slightly less sharp glass might be the better pick if you hike miles every day. There is no right answer that applies to everyone. There is only the answer that fits your hunting life.
If the scores are close, let the intangibles decide. Which binocular feels better in your hands? Which one do you want to use? I once chose a pair of binoculars that scored lower on paper because they balanced better in my hands. I used them for three seasons and never regretted it.
Finally, remember that price is not the same as value. A budget binocular that fits your needs and survives a season is a better value than a premium binocular that stays in the truck because it is too heavy to carry. Set your budget first, then apply the framework within that range. That is how to compare hunting binoculars and walk away with the right pair for your next hunt.
Frequently Asked Questions
What is the best magnification for hunting in dense woods?
For dense woods, stick with 7x or 8x. Lower magnification gives you a wider field of view, which helps you find a deer quickly when it appears between trees. It also makes the image steadier, because it is harder to hold a 10x steady in a tense moment. An 8×42 is the most versatile choice for eastern timber.
How does lens coating affect my comparison, and should I prioritize fully multi-coated over phase-coated?
Lens coatings reduce glare and increase light transmission. Fully multi-coated means every glass surface has multiple anti-reflective layers. That is the baseline you want. Phase coating is a specific coating for roof prism binoculars that corrects color shift and improves resolution. You need both. A roof prism binocular with phase coating but poor multi-coating will be dim. A fully multi-coated binocular without phase coating will have soft, off-color images. Look for a model that lists both.
Should I compare price or performance first?
Set your budget first, then compare performance within that budget. A pair of binoculars is not a good value if it costs $300 and performs the same as a $150 pair. Conversely, an $800 pair can be a great value if nothing under $500 comes close. The four-pillar comparison method works the same at every price level. Higher-priced binoculars generally score higher on optical performance and build quality because of better glass and tighter manufacturing, not because of the name on the side.
What is the difference between ED glass and HD glass, and which one should I look for when comparing?
ED stands for extra-low dispersion glass. It is a specific type of glass that reduces chromatic aberration, the color fringing you see on high-contrast edges. ED glass is a real, measurable improvement. HD is mostly a marketing term. Some brands use it to mean high definition, but it describes different things depending on the company. When you compare two binoculars, look for ED glass or explicit claims about low dispersion glass. If a model only says HD, ask what it means for that brand, then test the binocular for chromatic aberration yourself.
How important is waterproofing and fog-proofing in my comparison?
It is essential unless you only hunt in dry, warm conditions. Most hunting happens in weather, and rain or temperature swings will find every weakness. Waterproofing comes from O-ring seals inside the body. Fog-proofing comes from nitrogen or argon gas that pushes moisture out before the binocular is sealed. Both should be listed in the specs. If a binocular is not waterproof and fog-proof, take it out of your comparison immediately, no matter how good the glass is.